GDA Nursing Class Notes 40
SUTURING TOOLS:-
Suturing tools are instruments used by medical professionals to close wounds or surgical incisions using stitches (sutures). These tools help ensure proper wound closure, aid in the healing process, and minimize scarring. There are several types of suturing tools, each designed for specific purposes. Some common suturing tools include:
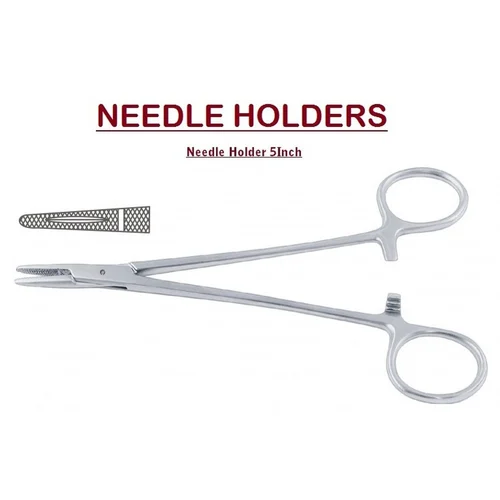
- Needle Holder: Also known as needle drivers, these instruments have a scissor-like design with serrated jaws to securely hold the suture needle while suturing. They come in various sizes and designs, such as straight or curved jaws, to accommodate different surgical needs.
- Surgical Scissors: Suturing requires precise cutting, and surgical scissors are used to trim excess tissue or suture material. There are various types of surgical scissors, including fine scissors for delicate work and larger scissors for cutting thicker tissues.
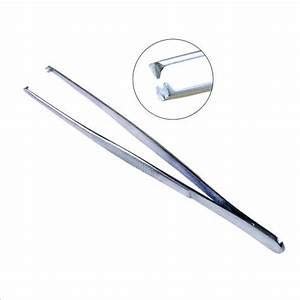
- Forceps or Hemostats: These instruments are used to grasp and manipulate tissues during suturing. They come in different shapes and sizes, such as tissue forceps, Adson forceps, or Kelly forceps, to assist in various surgical procedures.
- Suture Material: While not a tool in the traditional sense, suture material is an essential component of suturing. It comes in different materials, such as absorbable and non-absorbable, and different sizes (gauges). The choice of suture material depends on the type of tissue being sutured and the expected healing process.


TECHNIQUES OF SUTURING :-
Suturing techniques are methods used by medical professionals to close wounds or surgical incisions using stitches (sutures). Different techniques are employed based on factors such as the type of wound, location, tissue involved, and the desired cosmetic outcome. Here are some common suturing techniques:
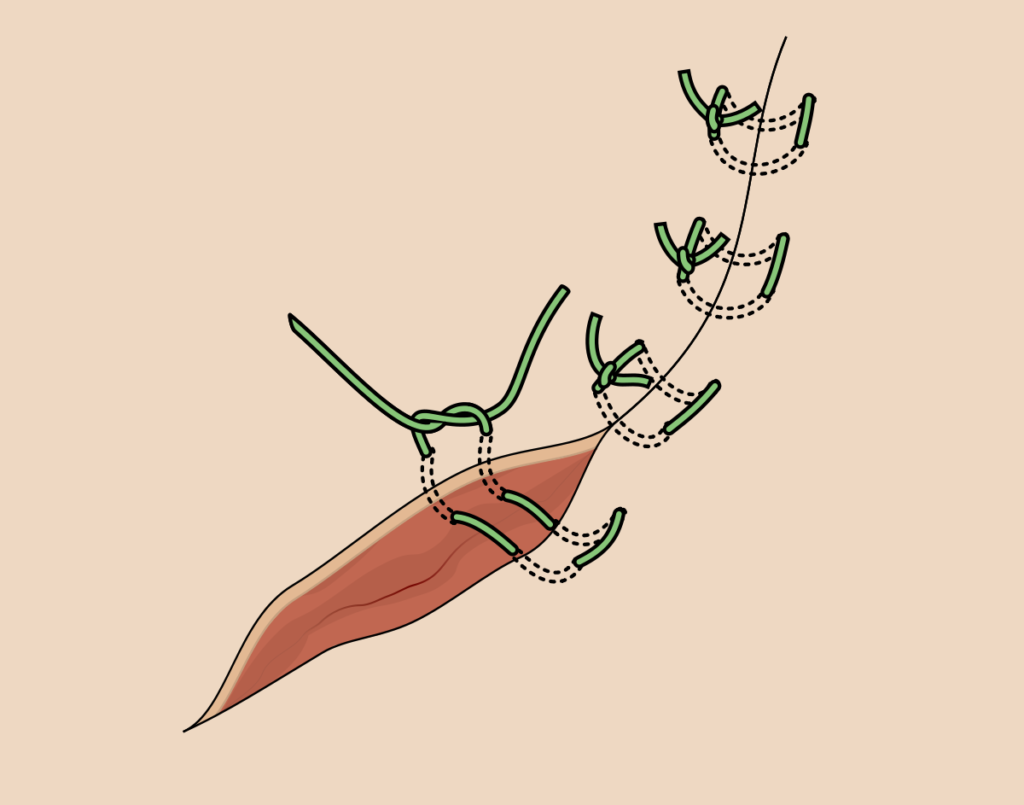
Simple Interrupted Suture: The simple interrupted suture is one of the most basic and widely used suturing techniques. It involves individually placing and tying knots along the length of the wound to approximate the wound edges and promote healing. This technique is versatile and can be used for various wound types, including both superficial and deep wounds.
Overall, the simple interrupted suture technique is a fundamental skill in wound closure. It allows for precise wound edge approximation and is often used for wounds that require meticulous closure to achieve optimal healing and minimal scarring.

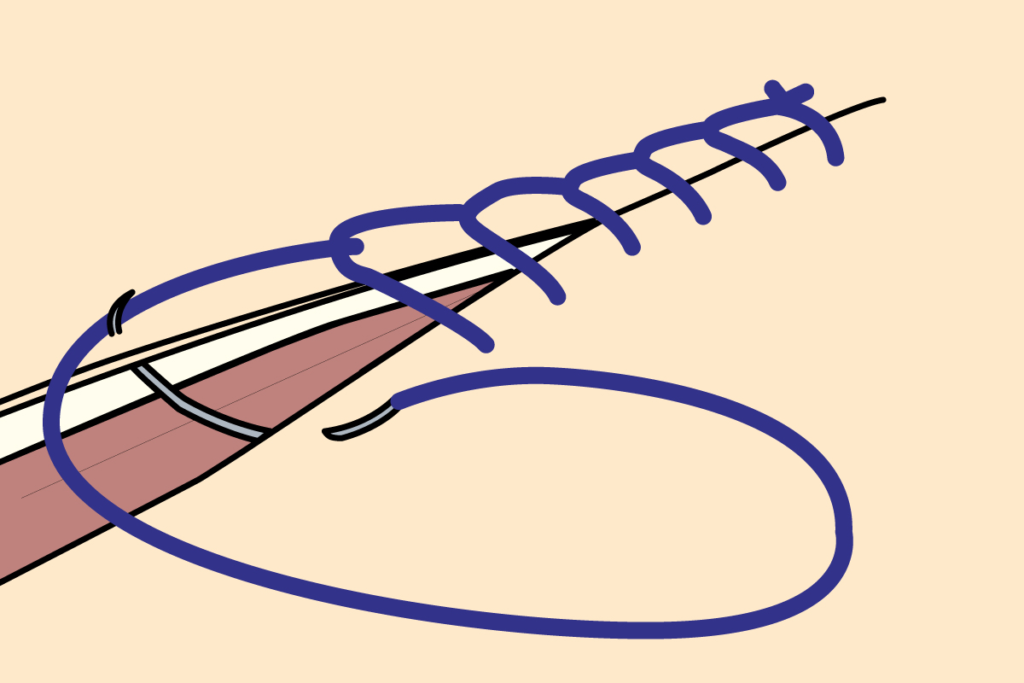
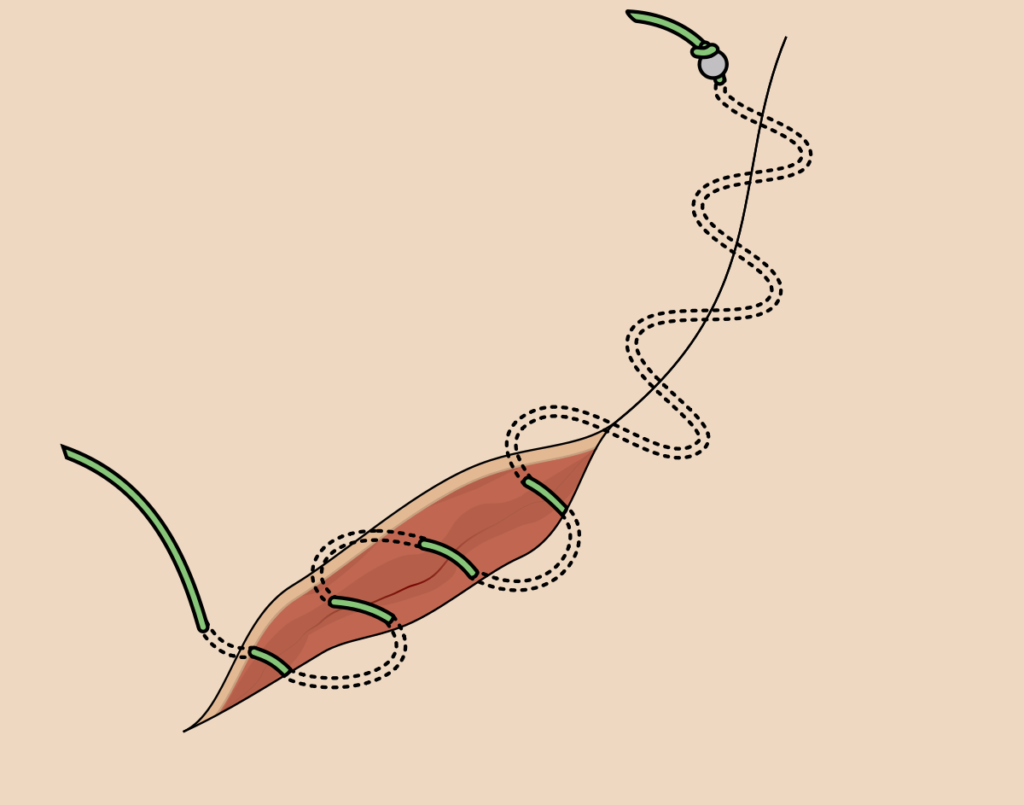
Simple Continuous Suture: Continuous suturing, also known as a continuous running suture or continuous stitch, is a suturing technique in which a single strand of suture material is used to close a wound or incision in a continuous, uninterrupted manner. Unlike the simple interrupted suture technique, which involves tying individual knots after each stitch, the continuous suturing technique involves placing a series of stitches without tying individual knots between each one. Instead, knots are typically tied at the beginning and end of the suture line. This technique is often chosen for its efficiency in closing longer wounds.
Overall, the continuous suturing technique is particularly useful for closing longer surgical incisions or wounds, where efficiency is important. However, it’s important to consider the specific characteristics of the wound and the potential risks associated with continuous suturing when choosing the appropriate suturing technique.

Locking continuous suture: A locking continuous suture, also known as a continuous locking suture or running locked suture, is a suturing technique that combines the benefits of a continuous suture with the added security of a locking mechanism between each stitch. This technique helps prevent the entire suture line from unraveling if one stitch breaks or becomes loose. The locking mechanism is created by incorporating an extra step in the suturing process that secures each stitch in place.
Overall, the locking continuous suture technique is a good choice for longer wound closures where additional security is desired. It strikes a balance between the efficiency of continuous suturing and the stability of individual interrupted stitches. As with any suturing technique, proper technique, sterile conditions, and knowledge of wound characteristics are crucial for achieving optimal healing outcomes.
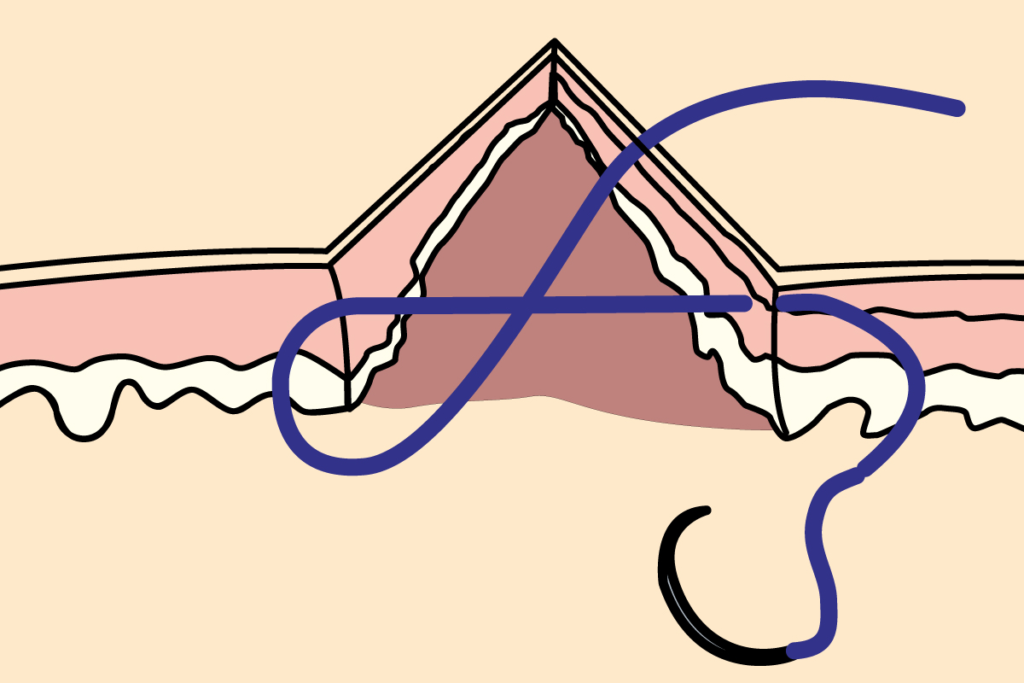
Vertical Mattress Suture: The vertical mattress suture is a suturing technique used to close wounds, especially those under tension or in areas where proper wound edge eversion (alignment) is crucial for optimal healing. This technique provides excellent wound edge approximation and is particularly useful when cosmetic outcomes are important. The suture pattern resembles a “mattress” due to its appearance of stitching through the tissue in two layers.
The vertical mattress suture technique is commonly used in plastic surgery, dermatology, and other specialties where precise wound closure and cosmetic outcomes are priorities. Proper technique and tension control are important to avoid complications and ensure optimal healing.

Horizontal Mattress Suture: The horizontal mattress suture, also known as the transverse or cross-mattress suture, is a suturing technique used to close wounds, especially those in areas under tension or where wound edge eversion (alignment) is crucial. This technique provides excellent wound edge approximation and is particularly useful when cosmetic outcomes are important. The suture pattern resembles a “mattress” due to its appearance of stitching through the tissue in two layers.
The horizontal mattress suture technique is commonly used in plastic surgery, dermatology, and other specialties where precise wound closure and cosmetic outcomes are priorities. Proper technique and tension control are important to avoid complications and ensure optimal healing.
Subcuticular Suture: The subcuticular suture, also known as the intradermal or subcutaneous running suture, is a suturing technique used to close wounds beneath the skin’s surface. This technique is particularly useful for achieving a cosmetically pleasing result with minimal scarring on the skin’s surface. The subcuticular suture avoids the need for visible knots or suture material on the skin, contributing to better cosmetic outcomes.
The subcuticular suture technique is commonly used for closing wounds after various surgeries, including those involving cosmetic procedures, obstetrics, and gynecology. Proper technique and attention to detail are essential for achieving the desired cosmetic results and optimal wound healing.
Intradermal suture: The intradermal suture, also known as the buried or subcuticular suture, is a suturing technique used to close wounds beneath the skin’s surface. This technique creates a concealed closure that reduces scarring and offers a more cosmetically pleasing result. Unlike the subcuticular suture, which runs parallel to the skin’s surface, the intradermal suture is placed within the dermis layer of the skin.
The intradermal suture technique is commonly used for closing wounds, especially those in areas where cosmetic appearance is a priority. It’s often utilized in plastic surgery, dermatology, and other specialties to achieve inconspicuous wound closure and optimal wound healing.
SUTURING PROCEDURE:-
The suturing procedure involves the process of closing a wound or incision using sutures (stitches) to promote healing, reduce the risk of infection, and minimize scarring. Proper technique is crucial for achieving optimal wound closure and healing outcomes.
Procedure:
- Preparation:
- Ensure a sterile environment by setting up a sterile field using drapes and wearing sterile gloves.
- Administer local anesthesia if needed to numb the area around the wound.
- Selecting Suture Material:
- Choose the appropriate suture material based on the wound characteristics, location, and expected healing time.
- Needle Loading:
- Load the suture material onto the suture needle using a needle holder. The type of needle and suture material will depend on the specific requirements of the wound.
- First Stitch:
- Choose an appropriate suturing technique (e.g., simple interrupted, continuous, vertical mattress) based on the wound’s characteristics and the surgeon’s preference.
- Insert the needle through one side of the wound, following the chosen technique, and pull it through to the other side.
- Tightening and Knot Tying:
- Gently pull the suture material to bring the wound edges together, ensuring proper alignment and eversion (edges turning outward).
- Tie the first throw of the knot to secure the suture. The knot can be a simple knot or a surgeon’s knot for added security.
- Tie a second throw to complete the knot, making sure it’s secure but not overly tight.
- Continuing Suturing:
- Repeat steps 4 and 5 for the remaining stitches, following the chosen suturing technique. Maintain even tension and consistent stitch placement.
- Final Knot and Trimming:
- When the wound is fully closed, tie a final knot to secure the last stitch.
- Trim the excess suture material using sterile scissors, leaving a short tail for easy identification during suture removal.
- Wound Care:
- Clean the wound area with an antiseptic solution and apply appropriate wound dressings or ointments if necessary.
- Post-Procedure Instructions:
- Provide the patient with instructions for wound care, suture removal (if applicable), and any follow-up appointments.
