GDA Nursing Class Notes 4
DRESSING WOUND
Dressing a patient wound refers to the process of applying sterile materials and covering to a wound or injury on a person’s body. The primary goals of wound dressing are to create an environment that supports the healing process, prevents infection, and promotes optimal wound healing.
Wound dressings serve several important functions, including:
- Protection: Dressings provide a barrier between the wound and the external environment, preventing contaminants and bacteria from entering the wound site.
- Absorption: Some wounds produce fluids, such as blood or exudate (fluid that oozes from the wound), which need to be absorbed to keep the wound clean and dry.
- Promotion of Healing: Certain dressings contain materials that can promote healing by stimulating cell growth and tissue regeneration.
- Comfort: Dressings can provide padding and protection to reduce pain and discomfort for the patient.
- Minimization of Scarring: Proper dressing techniques can help minimize scarring by keeping the wound edges aligned and preventing excessive tension.
- Control of Odor: In wounds with infection or foul-smelling discharge, dressings can help contain odors.
Dressing equipment :-
Dressing wounds requires specific equipment and materials to ensure proper hygiene, infection control, and effective wound management. Here are some common dressing equipment and materials:
- Gloves: Healthcare professionals should always wear sterile gloves to prevent contamination and protect both themselves and the patient from infection.
- Sterile Dressings: These are various types of sterile dressings designed to cover and protect wounds. Some examples include gauze dressings, adhesive bandages, hydrocolloid dressings, foam dressings, and transparent film dressings.
- Antiseptics or Cleansers: These are used to clean the wound area before applying the dressing. Examples include sterile saline solution, hydrogen peroxide, or iodine-based antiseptics.
- Scissors: Sterile scissors are used to cut dressings to the appropriate size and shape.
- Adhesive Strips: These are used to hold the edges of a wound together, especially in small cuts.
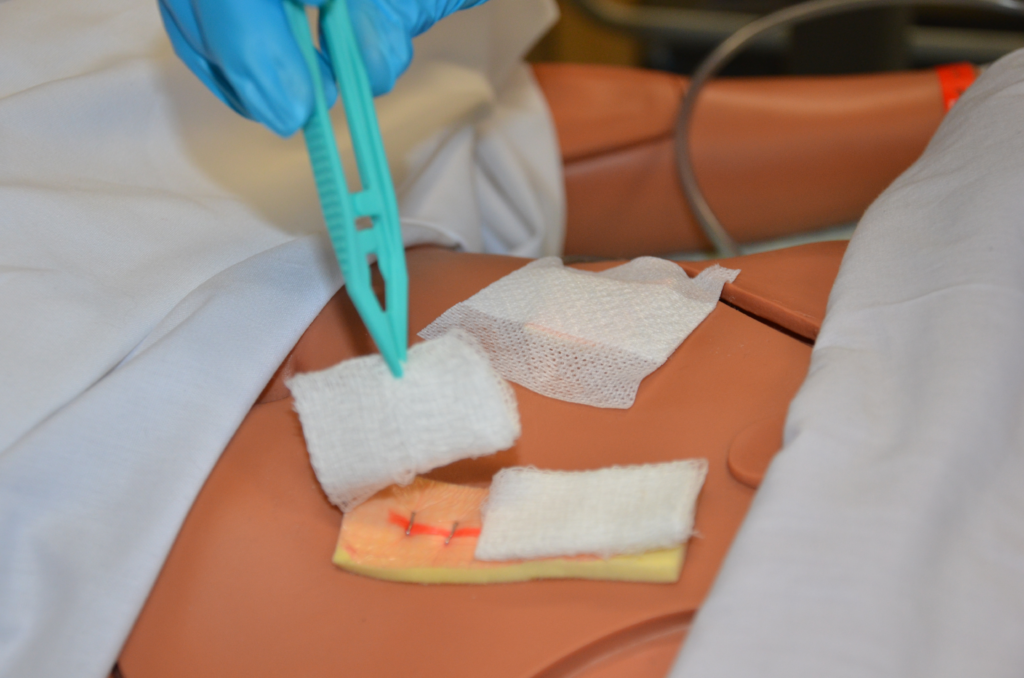
- Forceps or Tweezers: Sterile forceps are used to handle dressings and sterile materials without directly touching them.
- Disposable Bags or Waste Containers: Used to dispose of used dressings, gloves, and other waste materials in a hygienic manner.

Dressing procedure:-
The dressing procedure for a wound involves a series of steps designed to ensure proper wound care, prevent infection, and promote healing. It’s important to note that the exact procedure may vary based on the type and severity of the wound, as well as any specific instructions provided by a healthcare professional. Here is a general outline of the dressing procedure:
1.Prepare Yourself:
- Wash your hands thoroughly and put on sterile gloves to prevent contamination.
- Gather all the necessary dressing equipment and materials.
2. Prepare the Patient:
- Explain the procedure to the patient to ensure they understand what will happen.
- Ensure the patient is comfortable and positioned appropriately for the wound to be accessed and dressed.
3. Remove the Old Dressing (if applicable):
- Gently remove any existing dressings, taking care not to disturb the wound.
- Dispose of the old dressing and gloves in a proper waste container.
4. Cleanse the Wound:
- If instructed by a healthcare professional, use a sterile saline solution or antiseptic to clean the wound and surrounding area.
- Gently cleanse the wound with a sterile cotton ball or swab, moving from the center of the wound outward.

5. Dry the Wound (if necessary):
- Pat the wound area dry with a sterile gauze pad or allow it to air dry.
6. Apply Medications (if prescribed):
- If the wound requires the application of any topical medications or ointments, apply them according to the healthcare professional’s instructions.
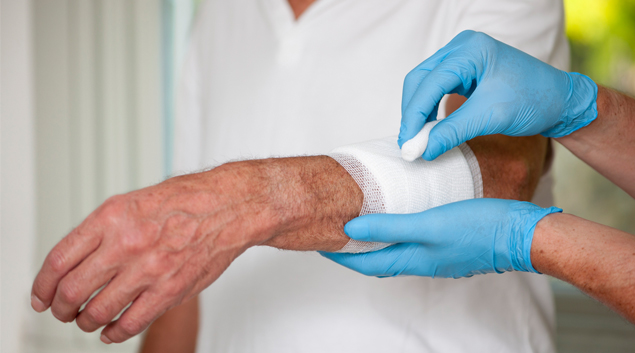
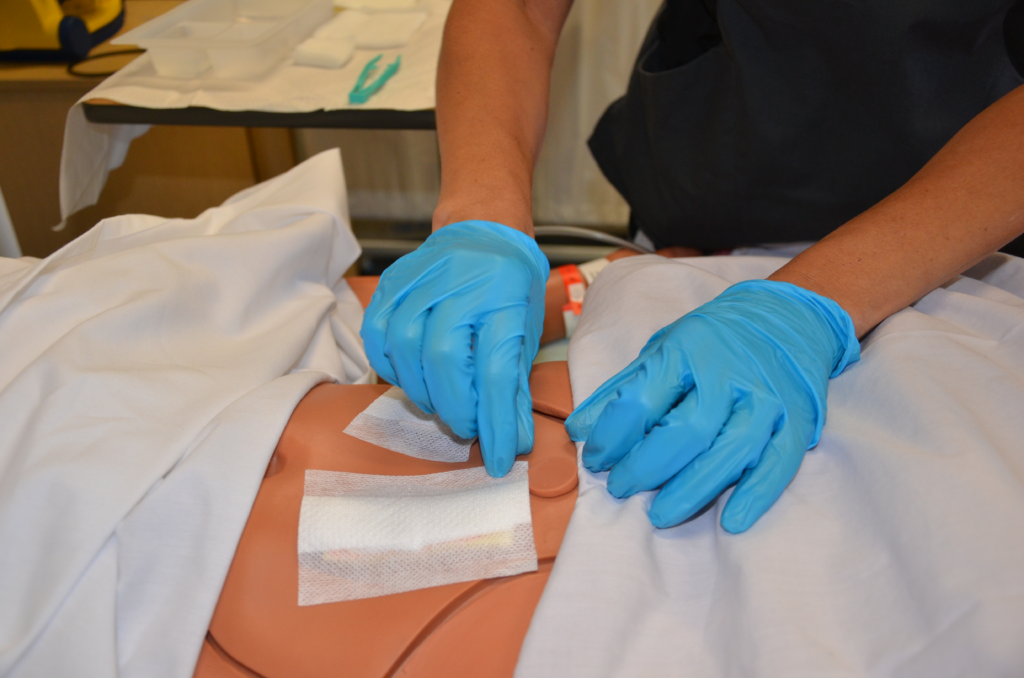
7. Apply the New Dressing:
- Select the appropriate sterile dressing based on the wound type and stage of healing.
- Gently place the dressing over the wound, making sure it covers the entire wound area.
- If needed, secure the edges of the dressing with medical tape, making sure not to place tape directly over the wound itself.
8. Secure the Dressing:
- If necessary, use additional dressings or bandages to provide additional support or compression, as directed by the healthcare professional.

TRANSFER PATIENT

Transfer patient” refers to the process of moving a patient from one location to another within a healthcare facility or between different healthcare facilities. This transfer can involve moving the patient from a hospital room to a surgical suite, from an emergency department to an intensive care unit, or even from one healthcare facility to another for specialized treatment or services.
A. Transferring a patient with the help of a wheelchair involves a series of steps to ensure the safety and comfort of the patient during the transfer.
1. Preparing for the Transfer:
- Ensure you have a suitable wheelchair available, with functioning brakes and sturdy construction.
- Wash your hands and put on gloves to maintain hygiene.
- Explain the transfer process to the patient and obtain their consent if they are able to provide it.
2. Assess the Patient’s Condition:
- Evaluate the patient’s mobility and level of assistance required for the transfer.
- Determine if the patient can bear weight on their legs or if they need full assistance.
3. Position the Wheelchair:
- Position the wheelchair next to the patient’s bed or chair. Lock the wheelchair brakes securely to prevent it from moving.
4. Assist the Patient to Sit Up:
- If the patient can sit up and has some mobility, assist them to sit at the edge of the bed or chair, facing the wheelchair.
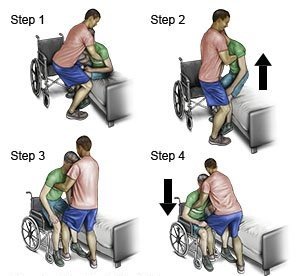
5. Pivot Transfer:
- If the patient can bear weight on their legs and pivot, follow these steps:
- Instruct the patient to place their hands on the wheelchair arms for support.
- Help the patient swing their legs off the bed or chair while maintaining their balance.
- On the count of three, assist the patient to stand up using the gait belt if necessary.
- Pivot the patient to face the wheelchair.
- Lower the patient into the wheelchair by having them bend their knees and guide them onto the seat.
6. Assisted Transfer:
- If the patient cannot bear weight or pivot, follow these steps:
- Position the wheelchair close to the patient’s bed or chair.
- Assist the patient to move their legs onto the wheelchair’s footrests.
- Gently help the patient shift their weight and guide them to sit on the edge of the bed or chair.
- Support the patient’s upper body as they turn to face the wheelchair.
- Lower the patient onto the wheelchair’s seat, ensuring their comfort and safety.
7. Adjust the Patient in the Wheelchair:
- Ensure the patient’s feet are resting securely on the footrests.
- Adjust any seat belts or straps to secure the patient if necessary.
- Position any supportive cushions as needed for comfort.
8. Unlock the Wheelchair Brakes:
- Double-check that the wheelchair brakes are unlocked before moving the patient.
9. Transport the Patient:
- Gently push the wheelchair from behind, guiding it smoothly to the desired location.
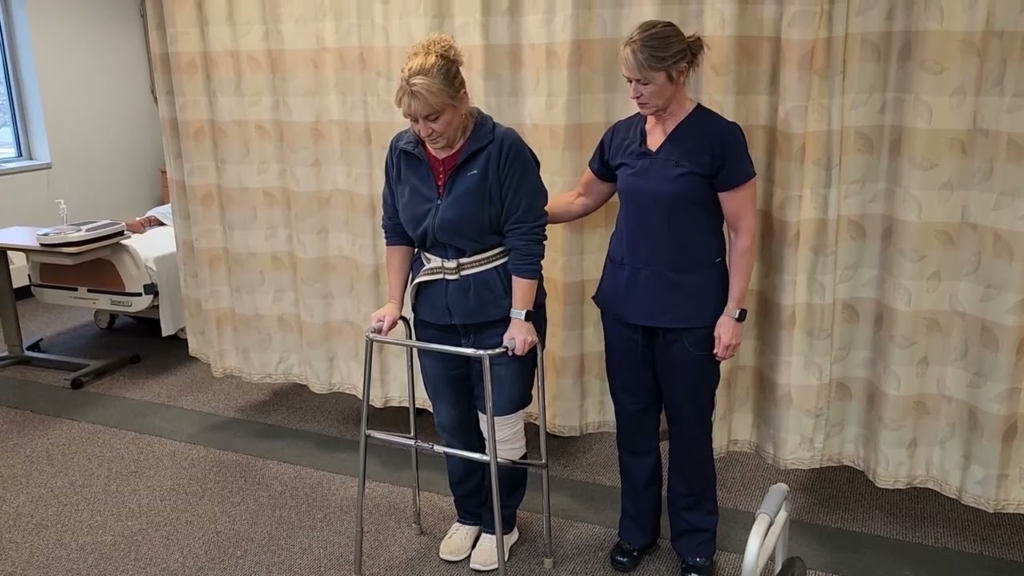
B. Transferring a patient with the help of a walker involves careful planning and execution to ensure the patient’s safety and comfort.
1. Assess the Patient:
- Before initiating the transfer, assess the patient’s physical condition and mobility level to determine if using a walker is appropriate.
2. Prepare the Environment:
- Ensure the area is free from obstacles or tripping hazards.
- Place the walker nearby, making sure it’s stable and properly adjusted for the patient’s height.
3. Communicate with the Patient:
- Explain the transfer process to the patient and gain their cooperation.
- Ensure they understand the steps and are comfortable with the transfer.
4. Assisting the Patient to Stand:
- If the patient is seated, help them scoot to the edge of the chair or bed.
- Assist the patient in placing their hands on the armrests or bed, and provide cues to push up using their legs.
5. Position the Walker:
- Position the walker in front of the patient, ensuring it’s at a comfortable distance.
- Make sure the walker’s handles are at the same level as the patient’s wrists.
6. Patient Grasps the Walker:
- Instruct the patient to hold onto the walker’s handles with a firm grip.
7. Stand and Move Forward:
- Assist the patient in standing, using the walker for support.
- Guide the patient to move forward while holding onto the walker.
8. Small Steps:
- Encourage the patient to take small, controlled steps with the walker.
- Monitor their balance and ensure they are comfortable with their movement.
9. Turning:
- If the patient needs to turn, instruct them to use the walker to pivot and turn small steps.
10. Approach the Destination:
- Guide the patient to the desired destination (e.g., a chair, bed, or bathroom) while maintaining their stability and balance.
11. Assist with Sitting:
- Help the patient gently lower themselves onto the chair or bed, using the walker for support as needed.
12. Ensure Comfort:
- Adjust the patient’s position as needed to ensure their comfort and safety.